attic Insulation Removal Costs
Written by Barrier Insulation Inc

Attic Insulation Removal Cost 2024

The cost of removing attic insulation can vary depending on several factors, but here’s a general breakdown:

Average Cost:

  • Per square foot: $1 to $2 per square foot of attic space.
  • Total cost: For a typical 600-square-foot attic, expect to pay around $600 to $1,200, with an average of $900.

Factors Affecting Cost:

  • Amount of insulation: More insulation means more labor and disposal costs.
  • Type of insulation: Different types like fiberglass, blown-in, or vermiculite require different removal methods and may have disposal regulations.
  • Condition of insulation: Wet, damaged, or moldy insulation may require additional safety measures and disposal procedures.
  • Accessibility: Difficult-to-reach attics or attics with obstacles may require more time and specialized equipment.
  • Disposal fees: Varies depending on location and type of insulation.
  • Labor costs: Hourly rates for contractors can differ.

Additional Costs:

  • New insulation installation: If you plan to replace the removed insulation, factor in the cost of new material and installation.
  • Electrical work: Moving or rerouting electrical wires may be necessary if they’re buried in the insulation.
  • Roof repairs: Removing insulation may reveal underlying issues with the attic or roof that need repair.

Tips for Saving Money:

  • Get multiple quotes: Compare prices from several qualified contractors before making a decision.
  • DIY removal (optional): If you’re handy and the insulation is easily accessible, you can consider removing it yourself. However, be aware of safety hazards and proper disposal regulations.
  • Negotiate with contractors: Don’t be afraid to negotiate the price, especially if you have a large attic or are getting other services done at the same time.

Remember, the cost of attic insulation removal is an investment in your home’s energy efficiency and comfort. Choosing the right contractor and considering all factors can help you get the best value for your money.

Do I Need Insulation Removal?

  • Age and type of insulation: If your insulation is older than 15-20 years, especially if it’s fiberglass or cellulose, its effectiveness might be declining. Vermiculite insulation could contain asbestos, requiring special removal procedures.
  • Moisture damage: Leaks, condensation, or poor ventilation can lead to mold growth or damp insulation, losing its insulating properties and potentially posing health risks.
  • Pest infestation: Rodents or insects nesting in the insulation can damage it and compromise its performance.
  • Planned renovations: If you’re planning major attic renovations, removing existing insulation might be necessary for better access and space utilization.

Signs you might need removal:

  • High energy bills: Inefficient insulation can lead to increased heating and cooling costs.
  • Icy roof in winter: Poor attic insulation can cause ice dams on the roof, potentially leading to leaks.
  • Visible mold or mildew: Mold growth in the attic indicates moisture issues and potential insulation deterioration.
  • Animal droppings or nesting materials: Signs of pest infestation suggest compromised insulation and potential health concerns.

Alternatives to removal:

  • Adding additional insulation: In some cases, topping up existing insulation might be sufficient, especially if it’s newer and in good condition.
  • Addressing underlying issues: Fixing leaks, improving ventilation, or pest control might solve the problem without removing the insulation.

What Is The Best Insulation For Attics?

1. Blown-in Fiberglass:

  • Pros: Excellent at filling irregular spaces and air gaps, cost-effective, fire-resistant, readily available.
  • Cons: Requires professional installation, can be itchy and irritating during installation, settles over time, less effective than some options in extreme temperatures.

2. Cellulose:

  • Pros: High R-value per inch (great insulator), good at absorbing moisture and sound, environmentally friendly, often made from recycled materials.
  • Cons: Requires professional installation, susceptible to mold growth if not properly ventilated, heavier than fiberglass, may attract rodents.

3. Spray Foam:

  • Pros: Excellent air sealing and insulating properties, creates a moisture barrier, long lifespan, can reduce noise.
  • Cons: Most expensive option, professional installation required, potential off-gasing of chemicals initially, not DIY-friendly.

4. Rockwool (Mineral Wool):

  • Pros: Fire-resistant, good soundproofing, non-irritating, doesn’t attract rodents, available in batts or blown-in form.
  • Cons: More expensive than fiberglass, slightly less R-value per inch than spray foam, can be challenging to install in tight spaces.

Additional factors to consider:

  • Your climate: Choose insulation with a suitable R-value for your region’s temperature extremes.
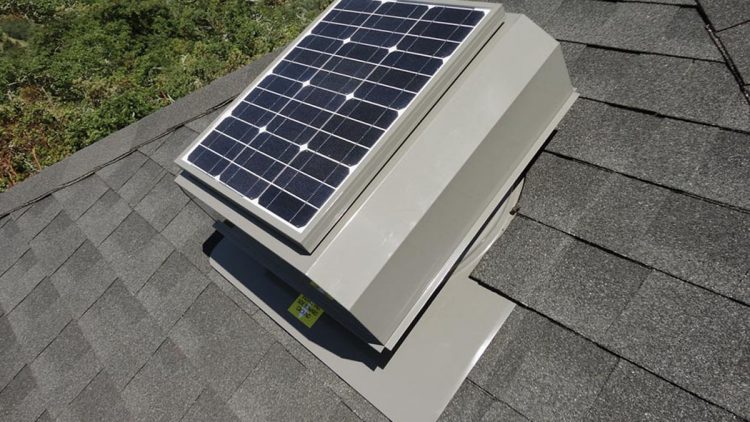
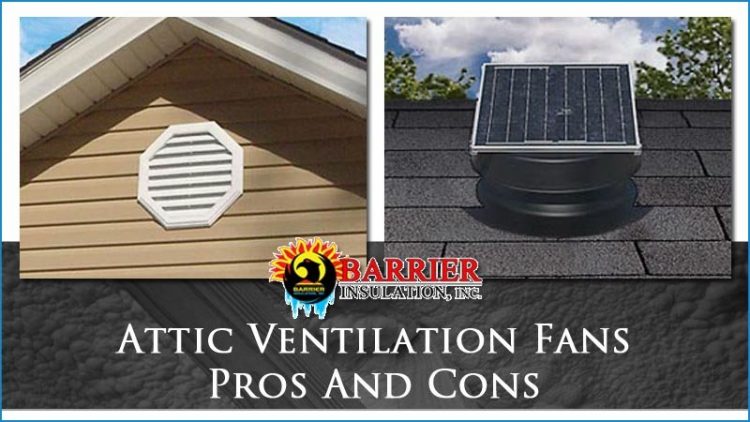
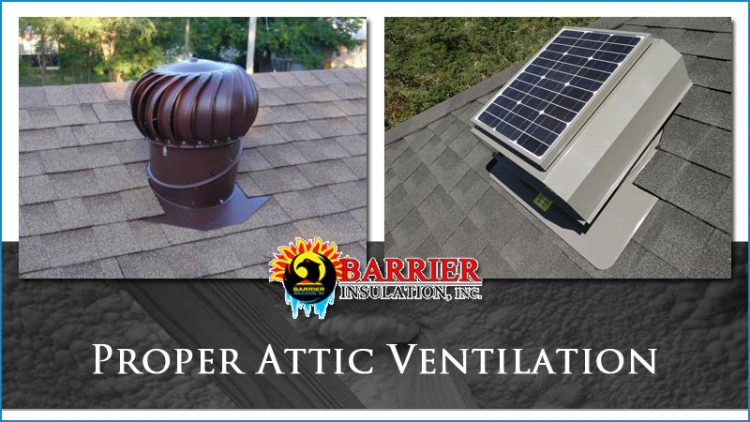
  • Existing ventilation: Proper attic ventilation is crucial for any insulation type to prevent moisture buildup.
  • Accessibility: Blown-in or spray foam might be better for hard-to-reach areas.
  • Budget: Fiberglass and cellulose are generally the most budget-friendly options.

Ultimately, the best insulation for your attic is the one that meets your specific needs and budget while offering optimal performance and longevity.

Schedule Your Insulation Services Today!

Whether you are building a new house, or just need to remove the old insulation and install a newer more energy efficient option Barrier Insulation is Phoenix’s first choice in home and commercial insulation. We proudly provide the valley’s more comprehensive insulation service that helps you stay more comfortable and save on energy. Click here to schedule on our website, or just give us a call at 602-499-2922.

Solar Attic Fan
Written by webtechs

Solar Attic Fans – Pros and Cons

When you are searching the web for “solar attic fans pros and cons,” keep reading about them. Solar attic fans are overheard fans that helps in circulating your attic’s air being powered exclusively by the sun. There are different pros and cons to installing these fans to your home or business.

Solar Attic Fan Pros

These fans have pros to them. Below are a few.

Runs On Solar Energy

Since these fans are sun powered, they are significantly less costly than most traditional fans. Meaning you are not going need any additional power from your house or business to run these fans. Electricity cost savings and being environmentally friendly are only 2 reasons why solar attic fans are becoming popular.

Cools Down Your Attic

Another pro in the solar attic fan list is the fact that these are going to considerably cool down your attic area. Cooling down your attic is then going to translate in keeping the whole house cooler. The hotter air that is expelled of the attic – the more hot air that is expelled of the home in overall. Solar attic fans are also known for keeping the attic area clear of any dangerous dirt or dust. Keeping the home’s temperature lower is going to help you save expenses on cooling costs down the road.

Less Costly Than Full Ventilation Systems

Solar attic fans are usually less expensive and are easier to install than a total ventilation system. These solar attic fans take less time and a much less intrusive installation.

Solar Attic Fan Cons

These fans have cons to them. Below are a few.

More Costly Than Motor Powered Attic Fans

Because solar attic fans are more new and use more technology for blowing hot air out of the attic area, they come with a bigger price tag. They are also more expensive for installation than a common motor-powered fan. The energy savings with these fans are going too far outweigh the higher installations expenses over time, though.

Not As Powerful As Motor Powered Attic Fans

Motor powered fans are more powerful than solar types since they use electricity. Despite the fact that using electricity is going to cost more to operate than relying on our sun. Therefore, even when motor powered fans push out more air, the added costs do not make this a long-term investment.

Needs Sun To Operate Effectively

This is basically the only chancy part of owning and using a solar attic fan. If you live in an area with little sunlight, your fan is not going to operate effectively. Other areas, like Phoenix, Arizona, provide an ideal amount of sunlight for these fans to run.

Schedule Your Solar Services Today!

Allow our team of experts to come to your home and assess your attic ventilation needs.  We can help you choose the type of ventilation you need, how much, and do the installation for you to make your home comfortable and energy efficient.  To learn more please visit our attic ventilation page or give us a call at 602-499-2922.

Attic Ventilation Fans Pros And Cons
Written by Barrier Insulation

Attic Ventilation Fans Pros And Cons

Attic ventilation fans have pros and cons.  While they generally help exhaust superheated air from your attic there is a risk they pull air-conditioned air from your home.


Keeping your home comfortable is expensive both in summer’s heat and winter’s cold.

It’s possible to lower the cost of keeping your home comfortable with attic ventilation and insulation.

In this post we will examine the pros and cons of attic ventilation and solar attic fans.


Attic Ventilation Pros

Phoenix Valley temperatures can easily go higher than 110°F.  That means your roof and attic’s temperature is much, much higher.  With outside temperatures reaching 110°F or higher the attic can reach 150°F or more!  If you’ve got air-conditioning ducts running through this superheated air is making them less efficient.

  • Keeps AC ducts cooler
  • Helps extend the life of roofing materials
  • Removes moisture from your attic
  • Helps reduce energy use and utility bills

Attic Ventilation Cons

The cons to attic ventilation revolve more around improperly installed solutions or excessive insulation.  This is most common in DIY installations of attic fans, ridge vents, and other attic ventilation solutions.

  • Blocked air flow from insulation covering ventilation points. Common mistakes occur around soffit vents and insulation baffles
  • Poorly sealed attics lead to fans pulling conditioned air from inside the home into the attic. While it’s great to keep the attic a more moderate temperature pulling in cooled air during the summer makes your AC unit work harder and is counterproductive

Solar Attic Fans Pros And Cons

Solar attic fans are a popular attic ventilation solution in Arizona.  This is due to both the higher than normal summer temperatures and abundance of sunlight.  A solar attic fan is just like the electric model but uses the energy of the sun to function.  This means that it’s exhausting the hot air from your attic without putting additional strain on your electric bill.

Solar Attic Fan Pros

Solar attic fans are popular in Arizona for a number of reasons.  Chief among them is that they run on the same energy that’s heating your attic.  They remove excessive heat to keep the attic cooler and help manage your home’s level of comfort.

  • Runs on the sun’s energy
  • Cools your attic
  • Costs less than full vent systems
  • Consumes less energy than electric models

Solar Attic Fan Cons

While a solar attic fan generally costs a little more than a basic electric model, they do use less power.  In some regions of the country that get a lot of rain and snow they aren’t as reliable.  However in Arizona there’s 299 days of sun on average in the Phoenix Valley.  This means that there’s plenty of solar energy to use to power your attic fan.

  • More expensive to purchase
  • Not as powerful as electric models
  • Must have sunlight to work

Phoenix Attic Ventilation Services

If you have a home that’s struggling to keep up with summer’s heat, we can help!  Don’t run your AC unit your bill is so high you consider living in caves.  Allow our team to help you install the right attic ventilation solutions and insulation to help you save money!

Call 602-499-2922 or Contact Us

Proper Attic Ventilation
Written by Barrier Insulation

Proper Attic Ventilation

If you’re searching for proper attic ventilation you’re likely a home owner trying to understand why you’d need attic insulation and how much you’ll need.  This post will introduce the type of attic ventilation that our team can install.

Natural Ventilation

It may be a bit odd to just add insulation for warmth and then just allow cold air to get into your home through vents, but this is actually a critical part to an energy efficient and durable home. This is why: During the winter, letting there be a natural flow of outdoor air to ventilate your attic will help to keep the attic cold, which actually reduces the potential for any ice damming. Ice damming is when snow melts off of the roof from an attic that is actually too warm and then refreezes within the gutters which causes a dam that can damage your roof. Having the right insulation and air sealing can even keep your attic cold during winter by blocking any entry of moist air and heat from in your home. During the summer, the air flow in a vented attic will move all the super-heated air out of your attic, which removes moisture and protects the shingles on your roof. The insulation will then resist any heat transfer into your home.

A very common mistake that a home owner can make when installing any insulation is to block up the air flow at the eaves. You never want to cover any attic vents with insulation. You need to use soffit and rafter vents to maintain air flow.

Fan Ventilation

An attic fan is used to cool down a hot attic by taking in cooler air from outside through attic vents and then pushing all the hot air outside. However, if your attic happens to have any blocked vents and it isn’t well sealed from your home, then attic fans will suck up your air-conditioned air out of your home and into your attic. This causes you to use more energy and makes your AC work much harder, which causes your electric bill to go up.

You do not want an unfinished attic to be cooled by your AC. To keep this from happening, follow the insulation and sealing strategies to ensure that your attic is ventilated using natural air flow and passive vents.

Doing the Job Yourself

Putting in fiberglass rolls will be the easiest for any DIY project. If you have any insulation between your rafters, install your second layer over it and make sure it is perpendicular to the first layer. This will help to cover joists and reduce any heat gain or heat loss through the frame. Whenever you are adding additional insulation, you will want to work from the opening in the attic. Never lay any insulation over soffit vents or recessed light fixtures. You want to keep the insulation around 5 inches from any type of can lights, unless it has been rated for insulated ceiling. If you happen to be using loose fill insulation, then you can use sheet metal to create a type of barrier around the openings. If you are using fiberglass insulation, then wire mesh can be used to create barriers.

Hiring Barrier Insulation

Barrier Insulation is happy to help Phoenix Valley residents stay more comfortable and have more energy efficient homes through installing attic ventilation.  Our team can handle all the details from attic volume calculations and choosing the vents or fans to the proper installation of your attic ventilation.  We will handle every conceivable detail for you so that all you need to do is focus on your day and we take care of the work.  We get it done faster and with less disruption to the conditions in your home.

Insulating a Rafter Vent

In order to cover the attic floor using insulation out of eaves, you will have to install rafter vents. Complete coverage of your attic floor as well as sealing up air leaks will make sure that you get the best type of performance from the insulation. Rafter vents will make sure that your soffit vents are clear and that there will be somewhere for outside air to come into the attic and out through the ridge vent. In order to install a rafter vent, you will just staple them directly to your decking on the roof. A rafter vent will come in either 4 ft by 14 ½ inches or 4 ft by 22 ½ inches for various rafter spacing. The rafter vent needs to be placed in the ceiling of the attic between rafters at the point where the floor meets the ceiling.

Once the vent is in place, then you can add blankets or batts, or even blow insulation, right out to the edge of the attic floor. You should note that blown insulation could need an additional block to keep the insulation from being blown into the soffit vent. You can place foam board on the outer edge which works really well.

Placing Rafter Vents

You can place a rafter vent between the rafters where the floor will meet the ceiling.

Adding Insulation

You can add insulation around the rafter vent and out to the edge of the attic floor. The added insulation will help ensure that your home stays comfortable and energy efficient.

Attic Ventilation Installation Service

Allow our team of experts to come to your home and assess your attic ventilation needs.  We can help you choose the type of ventilation you need, how much, and do the installation for you to make your home comfortable and energy efficient.  To learn more please visit our attic ventilation page or give us a call at 602-499-2922.